The Solar Panel Installation Process: A Guide

If you’re considering installing solar panels on your home or business, congratulations – you’ve taken the first step towards a more sustainable and cost-effective future!
However, the process of actually getting those panels up and running can seem daunting. Don’t worry though – we’re here to guide you through every step of the way.
In this blog post, we’ll break down the solar panel installation process into easy-to-understand steps that will help you make informed decisions as you embark on this exciting journey towards renewable energy.
So let’s get started!
Site Assessment
The first step in the solar panel installation process is to assess your site. This includes calculating the amount of sun your site receives, determining the best orientation for your panels, and assessing any shading issues. Once you have this information, you can decide how many panels you need and what type of system will work best for your home or business.
Plan the Design
Among the first steps is to determine the best layout for your solar panels. This will depend on the angle of your roof, the amount of sun exposure it gets, and any obstacles that could block sunlight from reaching the panels.
Choose the right solar panels. There are many different types and brands of solar panels available on the market. It’s important to do your research to find the ones that will work best for your needs, is suitable to your design, and fit your budget.
Permits and Paperwork
Gather the necessary permits and paperwork. This can vary depending on your location, but there are a few general things you’ll need.
First, you’ll need to obtain a building permit from your local municipality. This is usually a simple process, and the requirements are typically listed on the application.
Next, you’ll need to submit an interconnection application to your utility company. This will ensure that your solar panels are properly connected to the grid.
Finally, you’ll need to apply for a solar rebate from your state or local government. These rebates can offset the cost of your solar panel installation, making it more affordable.
With the right permits and paperwork in hand, you’re ready to start the solar panel installation process!
Equipment Ordering
There are a few things you’ll need to do to get your hands on the equipment needed for a solar panel installation. First, you’ll need to find a reputable solar panel dealer. You can do this by asking around for recommendations, or by doing some research online.
Once you’ve found a dealer, you’ll need to get in touch with them and place an order for the equipment you need. Be sure to let them know exactly what you’re looking for, and be clear about your budget.
Next, you’ll need to schedule a time for the equipment to be delivered. This is typically done through the solar panel dealer, so be sure to coordinate with them.
Once the equipment arrives, it will need to be installed by a professional from this great solar company. This is where things can start to get a bit pricey, so be sure to factor that into your budget.
Roof Preparation
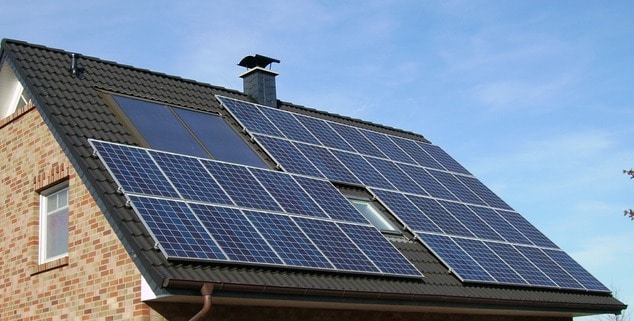
The process of installing solar panels begins with a site survey to assess the best location for the array. Once the site has been selected, the next step is to prepare the roof for installation.
This preparation includes cleaning the roof surface, making any necessary repairs, and installing flashing and other hardware to secure the panels. The last step in roof preparation is to connect the inverter and other electrical components.
Panel Installation
Installing solar panels is a process that involves more than just putting the panels on your roof. There are several steps involved in a typical solar panel installation.
Once everything has been designed and engineered, it’s time to start installing the system. This usually involves putting up mounts or racks for the panels, attaching the panels to those mounts or racks, and connecting all of the wirings.
Electrical Wiring
Electrical wiring is one of the most important aspects. This is because the solar panels will need to be connected to an electrical grid to function properly.
Once everything is installed and wired up, you will need to test your system to make sure that it is functioning properly. This can be done by using
Inverter Installation
Be sure to read the manufacturer’s instructions carefully. It is important to mount the inverter in a well-ventilated area to ensure proper cooling.
Be sure to connect the inverter’s DC input terminals to the PV array’s positive and negative busbars. Connect the inverter’s AC output terminals to the main breaker panel.
System Testing
System testing is the process of verifying that a solar panel installation can generate electricity safely and efficiently. This includes testing the panels themselves, the inverter(s), and the other electrical components of the system. System testing is typically done by a certified electrician.
Understanding the Solar Panel Installation Process is Essential
Understanding the solar panel installation process is essential to ensure quality, efficiency, and a rewarding experience. Taking the time to comprehend the required steps and having a general awareness of the technology can save time and money.
For those who are serious about having a successful solar panel installation, learning about the process is a must. So seek reliable guidance, ask your questions, and get the information you need. Get started today and make the transition to clean energy!
Should you wish to read more articles aside from this basic solar guide, visit our blog.


